Adding Direct Booking Solutions (DBS) to your website is a great way to drive more direct bookings and simplify the customer journey along the way. It is an easy-to-implement process that allows travelers to book directly through your website. To activate the Direct Booking Solution, please follow the steps below.
Step 1: Activate your Domain
- Log into your Operator Dashboard, click the 'More' tab, select the 'Direct Booking Solution', and select the 'Activation' option.

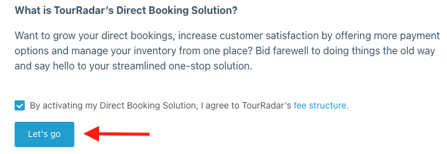
- After clicking Direct Booking Solutions, you can familiarize yourself with the DBS option and why it would be beneficial to you as an operator.
- Once you are ready to activate, you will need to agree to the fee structure.
- Next, scroll down and click 'Let's Go'. This will activate the Domain which is needed for the next stage of DBS.
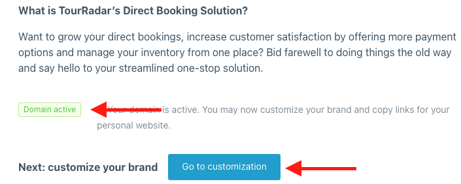
Please note that the Domain might take 1-2 minutes to activate.
- Once it says 'Domain Active', click the 'Go to customization' button which will take you to the branding and customization page.
Step 2: Branding and Customization
- On this page, you can add your logo, brand colour, email sender name and reply email the traveler will see while using the DBS.

- To add your logo, upload an image in the proper format, and adjust it to the proper size.

- Follow the same process to add both your company logo and your email logo.
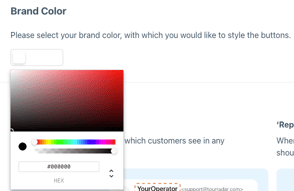
- Next, you will be able to select the brand colour for the DBS that would appear on your website, it is recommended that you match this with your Operator's website's colours for a clean look.
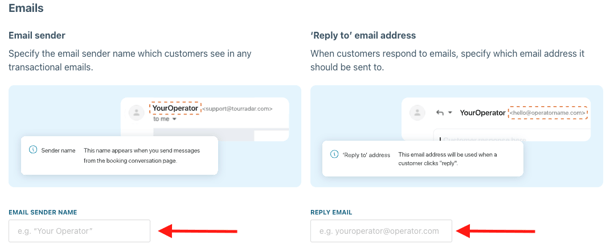
- Lastly, you have the option to modify your email sender details, which will be visible on the automated emails sent to travelers, ensuring a consistent and professional appearance.
Step 3: Links and Widget Center
As the Direct Booking Solution is a booking and enquiry solution that integrates seamlessly into your website, links and widgets are used to make this a simple process and provide steps for each part of the set-up process.
Links you will use:
Domain Name link
- Your domain name is determined by your TourRadar marketplace name. It is unique to you and will be used for all URL’s related to your account, such as tour booking links and tour inquiry links.

Contact Us link
- Use this to add a general 'contact us' page to your website. As a result, travelers will be able to enquire about your tours directly through your website.

Adventure Specific URLs
- These are links specifically for travelers to book a specific tour on your website, it includes both an enquiry link and a booking link. Simply, search for the specific adventure to find and copy the links. (*Note that the adventure needs to be loaded on the Operator Dashboard first before links can get generated for these)

Once you have activated your domain, customized your branding, and added/embedded the links to your website, you are all set to start having travelers enquire and book directly through your website!
You can also use the very helpful payment link option to send to the traveler. This way they can use this link to place the booking and make payment. You can find more information about the payment links here - How do I create a Payment link?
If you have followed these steps and encountered problems, please send us an email at partner-solutions@tourradar.com with details of what issues you are having.