How to Integrate Our Widgets Into Your WIX Site Using the Embed Option?
Follow the steps and video below for guidance on how to integrate your TourRadar Widgets onto your WIX page.
Widget Integration Steps
- Log into your Operator Dashboard, click on the 'more' tab, then 'Direct Booking Solution', and select 'Widget Center'.
- Select the widget you want to integrate. Find out more information about each widget here.
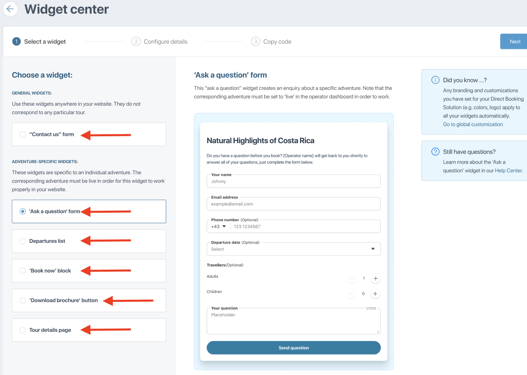
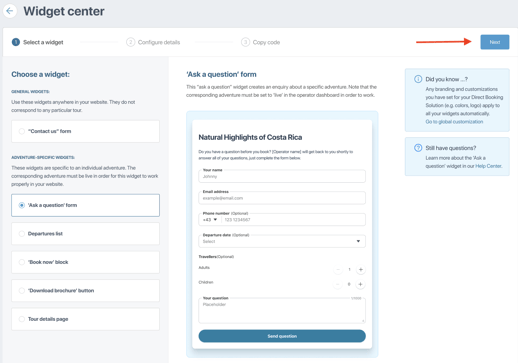
- Once clicked, you will see a preview of the widget and how it will appear on your website, select 'Next' to proceed to the customization of your widget.
- Customize the widget to fit your preferences. There are unique customization options for both general widgets and adventure-specific widgets.
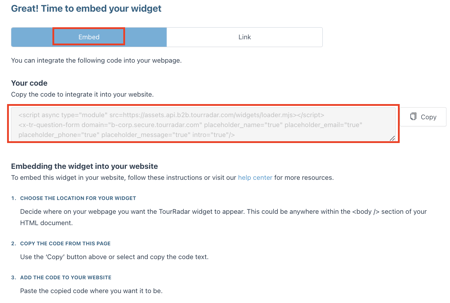
- After you have finished customizing your widget, you will need to select 'Generate code' to get the code to integrate your widget. Clicking 'Generate code' will automatically take you to the next step of the integration process.
How to Integrate a Widget on WIX
For more information regarding WIX, see their website here.
You can only use the Embed option for TourRadar's 'Departure list' and 'Book now' widgets.
Widget Integration Video
Widget Integration Steps
- Create the widget using the Embed option. You will need to open your WIX page in a different tab.
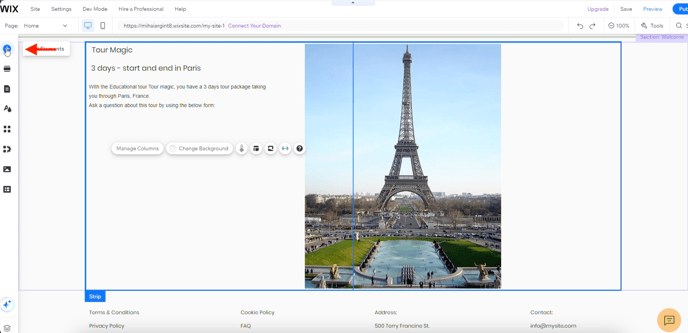
- On WIX, open the page you want to embed the widget on, Click the '+' sign on the left side of the screen.
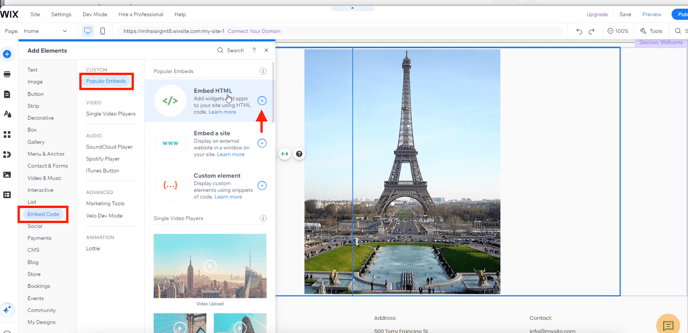
- After clicking, select the 'Embed Code', 'Popular Embeds', and click the '+' option for the 'Embed HTML' to add the widget to your site.
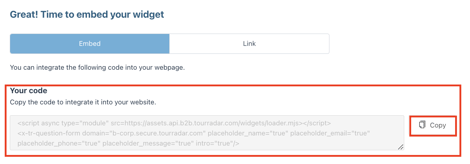
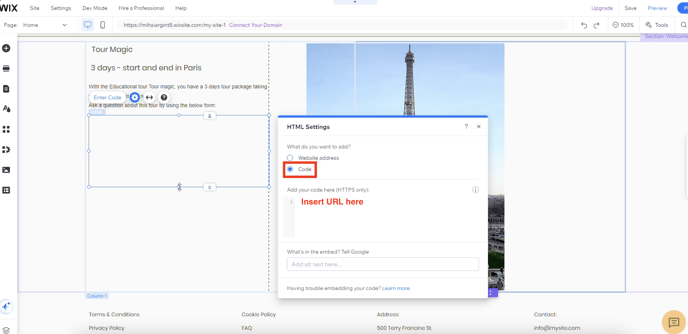
- In the pop-up box, select the 'code' option, copy and paste your TourRadar Widget URL that is provided in the 'Widget Center' of your Operator Dashboard.
- After inserting the URL, click the 'Update' button. Next, customize your widget and how you want it to look on your website. After saving, you should be able to see your newly updated widget on your website.
If you are having problems integrating your TourRadar Widget(s), please email us at partner-solutions@tourradar.com with more information about the situation.